Tag Archives: vintage camper

A New School, A Podcast, and A Road Trip

Hello lovelies,

Sorry I’ve been away from the blog for a few days – I have been very busy prepping for Tiny House Road Trip Spring 2013. What is this Tiny House Road trip? In my neverending quest for the essence of the tiny house movement, I have planned a tour of the eastern and southern US, during which I will interview, film, and photograph tiny house people and their homes. I leave in less than 2 weeks! The road trip is about one month total. I’m interviewing tiny house builders, designers, and dwellers, documenting everything with cameras, audio recorders, and the pen. I’m very excited to finally meet some of the tiny house bloggers and internet acquaintances that I have been following via the internet for a long time. I’ll return with lots of footage and insights to share with you all. So for the last week, Matt (cameraman, audio tech, and tiny house partner in crime) and I have been modding out my Honda Element with a platform bed with storage underneath, insulated window covers, black-out curtains, and custom vents for the windows. We’re just car camping the whole trip (not towing the COMET, alas) to save money. If you have a tiny house project or business or thing you think we should see, let us know in the comments! This is the first of multiple tiny house road trips I have planned. I hope it goes smoothly – we’ve been planning everything out to the last detail but you never know!

Also, I was delighted to be interviewed by Andrew Odom of TinyRevolution for his podcast, RevoConvo. He’s a super nice guy, and we share a common sponsor (GreenBuildingSupply.com). We talked about trailers and Worcester and off-grid systems. It was really fun, and you can all give it a listen next Thursday when it comes out! (I’ll post the link when it comes out).

Lastly, I wanted to mention that I’m going through an exciting transition right now in my (also unending) quest for Tiny House University and autonomous education. “Tiny House University” is my phrase for the unusual education/college path I have carved out for myself in search of a major in a subject that isn’t exactly mainstream. I left Hampshire College last semester, which was a hard decision. I had been on Field Study (independent, off-campus semesters) for a few semesters in a row, and realized that I would never be able to go back to campus and the traditional classroom, as the COMET has taken on a life of its own and more than anything I need the flexibility of independent education in order to pursue opportunities that arise thanks to the COMET. I was accepted at Goddard College, a non-residential school in Vermont (my favorite state…in the warmer seasons haha) and I start today! Basically you go to the campus once a year for one week to meet your advisor and create a study plan, then you go home to wherever you live and do whatever you do, while corresponding with your advisor once a month. Pretty cool! So I get to study tiny houses full time, and earn a degree in Sustainability, which is what I’ve been working towards for a few years now without even realizing it! I’m very excited for this new leg in a long journey towards Tiny House University.

Did you guys know I now write for Tiny House Talk on occasion? I’m very excited. Here was my first post: http://tinyhousetalk.com/tiny-houses-of-the-past/. And soon there will be another post on THT detailing my search for Tiny House University, a “how-to” for interested people!

Thanks for reading along, I hope to be able to update you all throughout my week at school and the road trip, but forgive me if I’m MIA for a minute!

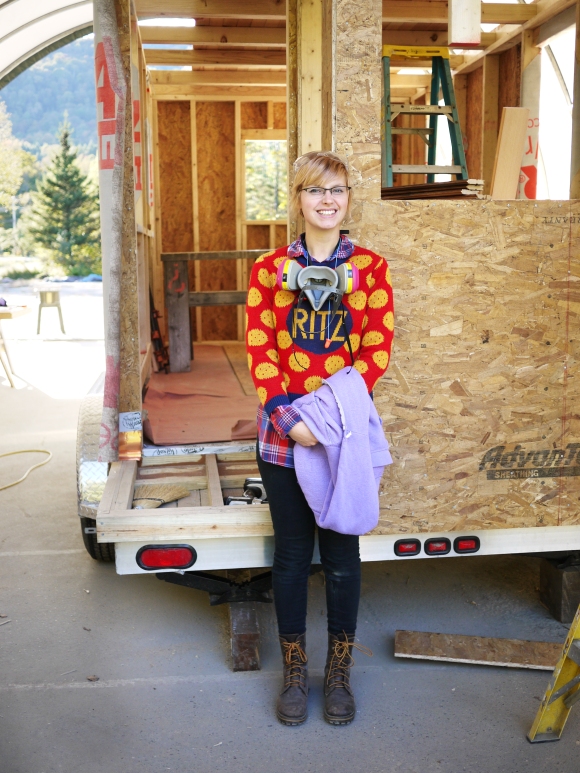
Photo courtesy of Swan Moon.

Photo courtesy of Swan Moon.

Tagged , , , , , ,

Sheet Metal Patches & Bodywork

It’s about 10 degrees here in MA today, and while I look back at these pictures from the summer I am wistful to say the least. So here’s some pictures of some sheet metal work we did on the trailer to patch some gaping holes and button the skins back up after replacing some of the wood inside the walls. Sometimes, when you replace the old rotten wood under the skins, they don’t fit back on just perfectly (they would if I wasn’t going to repaint the thing, but I am so I wasn’t too vigilant about it this time around). There was a gap on the corners of the trailer where the aluminum met and started to separate from the weight of the rear. These gaps had been there since I got the trailer, so I knew I’d have to patch it anyway.

First, we put a strip of sheet metal (aluminum flashing for this application – because it’s flexible/malleable) around the corner and underneath the member for extra protection. We just nailed it in to the new wood. This would be the flashing that would keep any water out. When you put the skins back down, caulk around the edges and screw it in with sheet metal screws (the ones with the little rubber gaskets work well for this, but we just caulked each spot where the screw would go before screwing it in).

This will fill the gap between the original aluminum siding that had separated at the corner. This is common to find in vintage trailers.

This will fill the gap between the original aluminum siding that had separated at the corner. This is common to find in vintage trailers. Matt’s hairy arm, not mine :).

Caulked and screwed back down.

Caulked and screwed back down.

We did the same thing to the spot under the old heater vent, which was a big gaping hole. We flashed with the aluminum strip wherever the skins didn’t meet up just right. This will keep the water out.

Under the old heater vent next to the front door (heater was removed). This step can be a pain in the butt, but is worth it to keep the new framing dry.

Under the old heater vent next to the front door (heater was removed). This step can be a pain in the butt, but is worth it to keep the new framing dry.

Once the flashing was in, we needed to patch that huge hole. We used a different type of sheet metal, stainless steel, for the flat panel that will cover this whole mess. See below.

The process is: caulk around the edges where you're going to place the panel, then lay it on and hold it in place. The caulk should squish out a little, and create a full seal. Put caulk dots all around and sheet metal screw into these spots so that it seals around the entry point of each screw.

The process is: caulk around the edges where you’re going to place the panel, then lay it on and hold it in place. The caulk should squish out a little, and create a full seal. Put caulk dots all around and sheet metal screw into these spots so that it seals around the entry point of each screw.

Close up detail.

Close up detail.

There you have it! We did this on the other side of the trailer where the original water fill was. We didn’t match the corrugation of the original aluminum siding because we figured it was all getting painted turquoise and won’t be a big deal, but if I was doing a period-specific restoration I would match the corrugation pattern of the aluminum.

Thanks for reading and there’s more to come!


Tagged , , , , ,

Updates, Updates! Plus: Vintage Trailer Eye Candy

Hello!

I need to apologize for my lack of uploaded photos of the COMET progress from the past month. It’s so frustrating, because I really want to share them with you all, but I am having technical difficulties with the camera, alas! HOPEFULLY I can resolve the issue soon and we can get back on track!

Until then, I have some other news:

1. Just got back from a 2 day “Greenhouse Design” workshop at Yestermorrow Design/Build School, where I finalized the design of my “bumper” garden – a mini, lightweight greenhouse mounted to the back of the trailer, supported by the bumper. It was great to learn about the different material options for building a greenhouse. In order to be as lightweight as possible, I’m going to go with aluminum framing and polycarbonate  sheets – a structural panel. Can’t wait to get started on the fabrication/building of that!

Greenhouse made from recycled windows, as seen on Apartment Therapy. Such a good idea! I also thought of upcycling an old carport into a small greenhouse.


2. Lloyd Kahn, my favorite tiny house/alternative dwelling author, is coming out with a new book and guess what it’s all about? Campers and houseboats! yay! He recently released his Tiny House book, which had a full page spread about mobile dwellings, but I can’t wait to get a hold of this book dedicated to unique camper houses and house boats. I think it is going to be titled “Wheels and Water”. If you live in an awesome trailer or houseboat, he is looking for submissions too for the book. Head over to http://lloydkahn-ongoing.blogspot.com/ for more on that!

3. I’ve been on a fermentation rampage the last few weeks. Saurkraut, Curtido (Salvadorean suarkraut for papusas), and Kombucha have been filling the fridge and the dark corners of the basement. I’ve been experimenting with double fermentation of the Kombucha and have been perfecting the Curtido recipe (which is extra magical as it uses whey as part of the fermentation process). I have more Kombucha mothers than I know what to do with at this point, but it’s nice to have enough to try all different flavors with. My first batch turned into straight up vinegar, but I have been planning on using that for salad dressings and other vinegar drinks that I have recipes for from the book “Making It” by Kelley Coyne + Erik Knutzen. I will share my super affordable, DIY $5 fermentation set up and some recipes soon!

4. I’m addicted to looking at Pinterest pages that are all about vintage camper eye candy. I have 4 new ones to share with you. It’s such a high concentration of vintage camper pictures in one place, it is almost overstimulating. Each one is full of good ideas for design + storage too.

Here we are:

Trailer Parks + Trailers I LOVE!

My Vintage Trailer Restoration

Creative Camper Interiors

Fun Little Campers

Some of them have some of the same photos, but for the most part each one is worth checking out if you love vintage trailer eye candy!

I am always trying to figure out what I want to be when I grow up (I feel like the answer will always be “Everything”). While at Yestermorrow, I get so excited about each subject I learn about it’s like a new career path unfolds in front of me every other week! I’ll be a solar house designer, I’ll be a Greenhouse builder, I’ll be a tiny house builder or a teacher. I made use of the drafting tables at Yestermorrow while I was there and after class did some “architectural” drawings of camper designs of the future (We can all agree that most modern RV designs are terrible and tacky, right?). Maybe I’ll be an RV designer and try to usher in a new era of campers that look like old campers! While I work towards the silliest degree in the world (I think I’ve explained my major before – vintage trailer restoration and the culture of mobile dwellings?), I try to see how I can apply it to the future of our culture and the planet. Not sure where I’m going with this, but that’s okay once in a while right? One step at a time! Sorry this was a bit of a rambling paragraph.


Anyway, I really hope to have the camera situation fixed very soon and then I can share more COMET progress and trailer restoration how-to’s. Until then, have a lovely day! and THANK YOU for reading!


Tagged , , , , , , , , , , , , , ,

Before + After: Replacing Rotten Framing in a Vintage Camper

Like I said, lot’s of catching up to do!

I’ve got to go back to 5 weeks ago and bring you all up to speed on the progress of the COMET. She was a MESS before we went to Tiny House Summer Camp, but if you saw the article on Deek’s website, you saw some pictures of what she looks more like now – less of a mess.
Anyway, here’s the first installment of catching up the website to where the COMET stands now.

BEFORE:

Some serious demolition. After stepping around the back and almost falling through the trailer floor onto the pavement 3 feet below, we decided to replace EVERYTHING. This demolition was made 10 times easier by the use of the SoniCrafter, using the plunge-cut blade to remove rotten wood to where it was solid again.

We cleaned out all of the wood-dust (used to be framing) and insulation from the floor. Under the floor, above the chassis, is a layer of sheet metal for protection. Everything had been destroyed by the termites/carpenter ants and water damage.

Daylight is never a good thing!

The photos above show where we removed the original rotted out 1 x 1 (yes, 1 x 1) framing from that rear of the trailer to halfway under the door frame. We had to remove up to the next joist after the wood became solid, so that we could have something to screw the new subfloor into. We removed the floor framing, then, using the SoniCrafter, we cut the wall studs at a line 5.5 inches above the metal trailer frame. We decided to replace the old 1 x 1 framing with a big 2 x 6, hence the 5.5″ height.

Spongey floor spots, be gone!

AFTER:

The solution was to replace the rotten frame piece with a 2 x 6, so that we were rebuilding the trailer better than it was originally built.


This 2 x 6 is the length of the beam we just removed and is marked to be notched out for the framing around the door frame, which we wanted to save.

We knocked it into place with a few hammer swings and it fit like a charm.

We ended up shimming a bit of this, but it fit nicely for the most part, and we didn’t have to rebuild the door frame!

Bolting the new frame piece to the chassis. The 2 x 6 is notched so the drill bit would reach the top, because it wasn’t 5.5″ long.

Somehow Matt was less excited about the new framing than I was. Thanks for the relentless help and support, could not have done this without him!


View from interior, all bolted in down the line.

Sistering on some new floor studs/joists.

Reframing around the wheel-well for the new subfloor.

I was a happy camper by the end of this little part of it. Next, we re-framed the entire back, raised the rear bed up 6  extra inches, re-insulated with the denim insulation, and more! More pictures of that part soon.

Oh, and all the lumber I used is FSC certified 🙂

As always, thanks for reading!

If you like the blog and would like to help me continue working on the COMET, please consider making a small donation over at the DONATE page of this site 🙂 Thanks!!


Tagged , , , , , , , ,

Lots of Catching Up to Do!

Hello Readers!!
No, I have not died or given up on the project or the blog, I am just finally, for the first time in weeks and weeks, finding a free moment to do a post. Things have been CRAZY the last few weeks, trying desperately to get the COMET in shape for Tiny House Summer Camp and then the Brattleboro KOA Vintage Trailer Rally. Basically I have not had a moment to myself since I got back from Yestermorrow on June 15th. Every single day (no lie!) for the last 6 weeks has looked a lot like this: wake up at 6 AM, be outside working on the COMET by 6:30 AM, work work work, take a 10 minute lunch break at 1, then back to work until 9 PM or sometimes later if I had to. All just to get the COMET in towable, working order (not pretty) for Tiny House Summer Camp (which was amazing) and the rally a week later. Did I mention the temperature has not gone below 95 that whole time? Needless to say, by 10 pm I was exhausted and I knew I had to put the blog writing on hold if I was going to make it up to Vermont for these two events.
I want to THANK YOU for bearing with me the last few weeks as I put the pedal to the metal with the COMET in terms of progress, and was away from the website. It was actually really good to have a deadline and serious motivation for getting certain things done, and pushing myself that hard for the last 6 weeks makes the rest of the project, what still needs to be done, look like a breeze!

Tiny House Summer Camp – this photo is so tiny!

Inside of the COMET at Tiny House Summer Camp

But now I finally have a break, and no COMET events in the very near future, so I will be doing a LOT of catching up and filling you guys in this week. Expect to see step by step how the COMET went from a carpenter ant’s palace to a real, functioning tiny home (though it still needs a lot of work, I can at least stay in it for an extended period of time comfortably). I’ll also post about Tiny House Summer Camp and the KOA Vintage Trailer Rally, both of which were huge successes for first time events, and show lots of pictures!! It’s really interesting how the COMET fits into all of these different worlds and subcultures, somewhat seamlessly. Anyway, I’ll be catching up on the website this week so check back!

Looking ahead, I am working on putting together and curating an exhibit at the Madsonian Museum of Industrial Design (in Waitsfield, VT, right near Yestermorrow Design/Build School). The exhibit is all about the designs that make up our summer vacations – think vintage picnic baskets, a plaid Thermos, canoes, swimsuits, and more. The exhibit will have a one day grand opening, with a show that includes vintage boats, cars, surfboards, a vintage swimsuit fashion show, vintage trailers, and more, followed by an exhibit in the Museum that will be up for a few months. If you have any vintage Summer Vacation items that you would like to see in a museum exhibition, get in touch! Also, if you have a vintage trailer that you would like to bring to the one-day show (or a teardrop that would fit into the museum) do get in touch! The event is scheduled for September 16th.

Besides that, there is another vintage trailer rally in Salisbury Beach, MA in October this year that I’m planning on taking the COMET to. And another Tiny House Workshop with Derek Diedricksen in November (I think the dates are 2-3) at his home in Stoughton, MA. By November the COMET will be mostly complete – solar panels, bumper garden, and all the details of a lived-in tiny home. I’m looking forward to showing a more completed version of the COMET to people. I’m always a little nervous when people see her in the construction/mid-renovation state, I feel like I have to frantically explain that she will look better when she’s done, and that she isn’t complete so don’t judge it yet!

Anyway, lots more in the coming days. I’ve missed my daily writing routine and can’t wait to get back in the habit, I have lots to share!

**And a HUGE thank you to Derek Diedricksen of relaxshacks.com for making Tiny House Summer Camp so awesome, and another huge thank you to Beverly Kenney, owner of the Brattleboro North KOA, who planned and organized a very fun, super successful weekend of vintage trailer fun. If you are ever in the area, I highly suggest camping at Brattleboro North KOA. It’s gorgeous, less than 5 minutes from the wonderful downtown Brattleboro VT, and they have a pony that lives on the premises! Oh, and the game room has a Star Trek pinball machine. We were in heaven!**

Tagged , , , , , , , , , ,

Off-The-Grid COMET models

Hello!

I’ve been working up some 3D models (using SketchUp) of the COMET as she may end up, or the “end result” models. These are likely to change as the design process continues and ideas solidify, but here was what I first envisioned The COMET to look like. Perhaps the rainwater harvesting system will change, and the solar modules might be in different places or as a separate array that pops up and can move around in order to collect optimum sun, but here’s my totally self-contained version of The COMET of the future.


Also, here’s one version of an “info sheet” that explains the COMET in a more comprehensive way.

What do you think? Is there anything else that a comprehensive info sheet about the project should include? I need some feedback!

Tagged , , , , , , , , , , ,

Exterior Paint Design Concept

Good morning!

I’ve been working on some paint schemes for the exterior of the COMET. I think that because I’ll be towing it around so much in the next few months, going to Tiny House Summer Camp With Derek Diedricksen in July, and the KOA vintage trailer rally and sustainable weekend event in Brattleboro, VT, it’s really important I have the outside looking nice and giving people some info about the project.

I love the little stripe details that reference a comet in the seafoam section. I’m also going to put a seafoam colored atomic-looking comet shape behind The COMET text, to tie it all together. I still need to figure out where to put the website and other info.

What do you think? Any suggestions? Let me know in the comments!


Tagged , , , , , , , ,

New Event Added to Events + Appearances, and a call for vintage campers + Tiny Housers

Hey everybody!

I mentioned about a week ago that I was planning, in conjunction with the Brattleboro, VT KOA (Kampground of America), a vintage trailer + tiny house rally/event for the weekend of July 20-22. I’ve added the event to the Events + Appearances page of this website, so check out full details there!

In celebration of their 40th anniversary, the KOA of Brattleboro, Vermont is hosting a rally/event to honor vintage campers (and any other unique mobile dwellings). We are looking for vintage campers, tiny houses on wheels, gypsy caravans, custom buses/vans, and any other unique dwelling on wheels that could fit into a campsite to attend the rally and display their camper/etc. Enthusiasts are also welcome! Bring your restoration, your custom caravan, or your vintage vehicle. There will be many interesting one-of-a-kind mobile dwellings, and the weekend will be full of cool caravans of all kinds. Please get in touch with me (via the CONTACT page) if you are interested in attending with your little home on wheels. Those who display their camper (or any other vehicle/trailer) get a special discount for the weekend!

The COMET will be there, on display, and I’m really excited to show off it’s progress!

Now check out this awesome vintage trailer!

Tagged , , , , , , , , , , , ,

A very exciting time: a call for Vintage Campers, Vardos, Caravans, Buses, Vans and Tiny Houses

Good morning!

It is a very exciting time to be working on The COMET. As I mentioned yesterday, The COMET and I will be making an appearance at the Tumbleweed Tiny House Workshop in Boston next month, as well as Derek DEEK Diedricksen’s Tiny House Summer Camp weekend in July. Now I am planning an event at a campground in Brattleboro, VT that honors vintage campers (and in the COMET’s case, looks to the future while honoring vintage trailer past) and tiny houses. It really is a dream come true for me. It’s almost too exciting! If you are in the Northeast and have a vintage trailer or are a vintage trailer enthusiast, please get in touch with me via the CONTACT page, as I am looking for more vintage campers/converted vans/gypsy caravans/custom buses/unique mobile dwellings of all types to come to this event in Brattleboro. People who bring a vintage camper/van/caravan/etc will get a special discount at the campground. Similarly, if you have a tiny house on wheels that you would like to display at this rally/event, please get in touch with me! It’s going to be great to have vintage campers next to tiny cabins. Anything unique and on wheels!

I want to see more Cramps themed campers....photo taken from Hicksville Trailer Palace website

Also at the Hicksville Trailer Palace. One of my favorite vintage camper photos.


Tagged , , , , , , , , , ,

For the love of Ordinary Things: My Top 5 Favorite Things About The COMET

When my camper buddy Hayden (who once had an indoor vintage camper collective in NYC and still has multiple Airstreams in his lot in the city – more on him later) said that he needed a place to put this camper that he had ASAP, he knew I wasn’t going to say no. He drove up to Massachusetts from NYC in the middle of the night, and dropped The Avalon (the trailer that is now The COMET) off at the house I lived in at the time. It was supposed to be a temporary situation – he just needed the space in NYC and I lived in a place I could keep a camper. I was either going to get rid of it for him or something like that. But as I said before, campers keep falling into my lap and then I fall in love with them. I was in The Avalon for about 10 minutes and then realized it was probably my soulmate. The previous owner had left tons of vintage shoes and clothes in the closet, in my size. That sort of tipped me off: This camper is awesome.

I knew that I was in the market for a camper trailer to convert into an off-grid tiny house, but I didn’t know what I would end up with. I thought it would be something bigger, something in worse condition, something else. I know I found the right one. Here are my top 5 favorite things about The COMET, part of the reason why I chose her for the project! The COMET really is one-of-a-kind. Vintage camper enthusiasts and vintage lovers in general, feast your eyes! Let’s do this like a countdown!

#5 – The light fixtures (and other weird atomic amoeba hardware)


These 1960’s light fixtures are all in beautiful condition and have the original fiberglass shades still in them. Just look at them!
#4 – The appliances.


The stove and oven, the sink and the “Swing-A-Way” can opener (attached to the wall) are all a matching pink color. Even the Hydro-Flame furnace is the same pink enamel!
#3 – The built-in picture clock.


I don’t know if this was standard in Avalon trailers of the 1960’s or any trailer of the past, but there is a built-in picture clock with an image of Acadia National Park (Maine) mounted on fancy green brocade fabric wallpaper in the cabinet in the back of the camper. I’d seen normal clocks built in to older campers, but never something like this with such a specific geography. So unique!
#2 – 1950’s Indesit refrigerator


This fridge isn’t original to the Avalon. It came out of another camper but Hayden threw it into the Avalon when he brought it to me, thinking maybe I could use it or sell it or something. It weighs a ton so I haven’t moved it yet, which is why these pictures are so silly and sideways. It’s a classic 1950’s style refrigerator – just miniaturized for a camper! It’s white on the outside, has a little crown emblem on it, sea-foam green interior, and built-in countertop attached above it (50’s linen print formica with aluminum trim!). The interior has a special egg-specific shelf with 12 little egg-shaped indents. It’s incredible.
#1 – The Flower Power finish brads


Maybe this is an unexpected favorite feature. It’s really small and not immediately noticeable, but it’s a finishing touch that I’ve never seen before and think is absolutely hilarious and distinctly 1960’s. On the ceiling, each finish brad that holds the ceiling panels up on the frame is covered by a little plastic flower cover. It’s such a unique thing to do. I guess I can’t really put into words why it’s so enchanting, but if I had to try: I just think it’s amazing that the person who designed this camper made something as simple as a flathead finish brad into an extraordinary design element with a little plastic flower. It’s the attention to detail of that era that really gets me excited.

***
Another thing that I love about The COMET that I didn’t include here is all the original paperwork: owner’s manuals, instructions for how to use the appliances and systems, little illustrations, and mail-in order forms from the 1960’s. It’s rare to find all that stuff in such an old camper that’s changed hands so many times. All those little pieces of history are really interesting to me. I’ll post pictures of the manuals and everything else soon, just for fun!

More practically speaking, why did I choose the Avalon as the camper to build my off-grid tiny house out of? It was inexpensive, it was in incredibly good condition for it’s age and price, it had a bathroom closet (really important!) and was just the right size for one person. I figure 16 feet is the smallest camper I would be comfortable in for full-time living. I wanted it to be the smallest possible while still being comfortable – less heating and construction costs that way.

Tagged , , , , , , , ,