Category Archives: Sustainable Design

A New School, A Podcast, and A Road Trip

Hello lovelies,

Sorry I’ve been away from the blog for a few days – I have been very busy prepping for Tiny House Road Trip Spring 2013. What is this Tiny House Road trip? In my neverending quest for the essence of the tiny house movement, I have planned a tour of the eastern and southern US, during which I will interview, film, and photograph tiny house people and their homes. I leave in less than 2 weeks! The road trip is about one month total. I’m interviewing tiny house builders, designers, and dwellers, documenting everything with cameras, audio recorders, and the pen. I’m very excited to finally meet some of the tiny house bloggers and internet acquaintances that I have been following via the internet for a long time. I’ll return with lots of footage and insights to share with you all. So for the last week, Matt (cameraman, audio tech, and tiny house partner in crime) and I have been modding out my Honda Element with a platform bed with storage underneath, insulated window covers, black-out curtains, and custom vents for the windows. We’re just car camping the whole trip (not towing the COMET, alas) to save money. If you have a tiny house project or business or thing you think we should see, let us know in the comments! This is the first of multiple tiny house road trips I have planned. I hope it goes smoothly – we’ve been planning everything out to the last detail but you never know!

Also, I was delighted to be interviewed by Andrew Odom of TinyRevolution for his podcast, RevoConvo. He’s a super nice guy, and we share a common sponsor (GreenBuildingSupply.com). We talked about trailers and Worcester and off-grid systems. It was really fun, and you can all give it a listen next Thursday when it comes out! (I’ll post the link when it comes out).

Lastly, I wanted to mention that I’m going through an exciting transition right now in my (also unending) quest for Tiny House University and autonomous education. “Tiny House University” is my phrase for the unusual education/college path I have carved out for myself in search of a major in a subject that isn’t exactly mainstream. I left Hampshire College last semester, which was a hard decision. I had been on Field Study (independent, off-campus semesters) for a few semesters in a row, and realized that I would never be able to go back to campus and the traditional classroom, as the COMET has taken on a life of its own and more than anything I need the flexibility of independent education in order to pursue opportunities that arise thanks to the COMET. I was accepted at Goddard College, a non-residential school in Vermont (my favorite state…in the warmer seasons haha) and I start today! Basically you go to the campus once a year for one week to meet your advisor and create a study plan, then you go home to wherever you live and do whatever you do, while corresponding with your advisor once a month. Pretty cool! So I get to study tiny houses full time, and earn a degree in Sustainability, which is what I’ve been working towards for a few years now without even realizing it! I’m very excited for this new leg in a long journey towards Tiny House University.

Did you guys know I now write for Tiny House Talk on occasion? I’m very excited. Here was my first post: http://tinyhousetalk.com/tiny-houses-of-the-past/. And soon there will be another post on THT detailing my search for Tiny House University, a “how-to” for interested people!

Thanks for reading along, I hope to be able to update you all throughout my week at school and the road trip, but forgive me if I’m MIA for a minute!

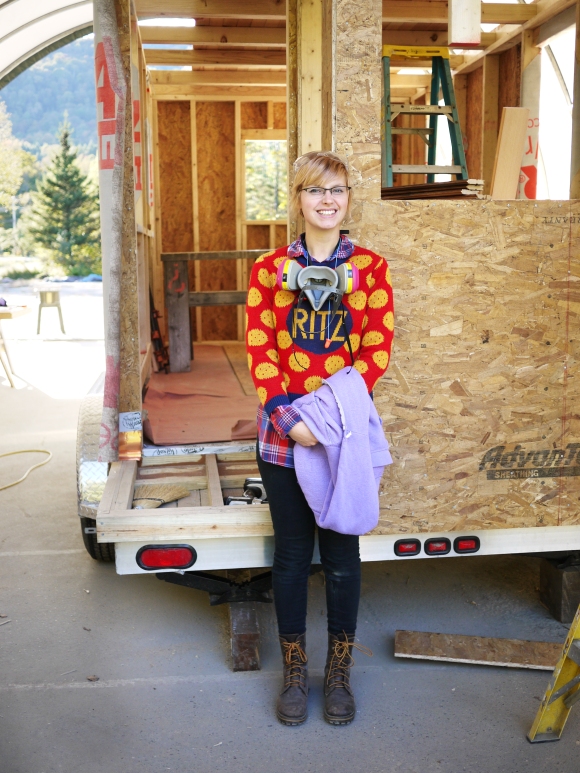
Photo courtesy of Swan Moon.

Photo courtesy of Swan Moon.

Tagged , , , , , ,

I love my tiny house.

Okay, okay, so I know I’m still trying to catch up the blog with the progress in a chronological and step-by-step fashion – but I can’t help it. I love my little house (even though it’s unfinished) and I want to share what it looks like with you all at this point! So let’s look into the future-present at the most recent photos of the COMET. Give me your feedback in the comments! We’ll get back to the progress updates later – unfortunately this did not all happen overnight 🙂

DSC_7250

DSC_7252

DSC_7256

DSC_7257

DSC_7261

DSC_7265

I'm in love with this little custom hand-made soap holder that Matt made for my kitchen. It keeps the soap off of the valuable counter space and also covers up some irreparable damage on the original back splash so that I could re-use it!

I’m in love with this little custom hand-made soap holder that Matt made for my kitchen. It keeps the soap off of the valuable counter space and also covers up some irreparable damage on the original back splash so that I could re-use it!

DSC_7266

Step into my office...

Step into my office…

Humanure Deposit Receptacle - With Urine Diverting Action

Humanure Deposit Receptacle – With Urine Diverting Action

My new, very modest, closet.

My new, very modest, closet.

DSC_7283

If my cat were in the camper that's the sunny spot she would be sleeping on!

If my cat were in the camper that’s the sunny spot she would be sleeping on!

The couch in the back is also my bed – it folds down/pulls out to be quite comfortable (awesome fabric from Sew Fine Fabrics on Etsy). You can see the Marmoleum click flooring that I used (courtesy of GreenBuildingSupply.com) and the turquoise Marmoleum sheet good countertops (which everyone mistakes for being original – which means I picked the right color!). At first I thought all the colors were a little much, but I like them now. It fits my style. I’m happy with my little fold-down desk area in the back, made out of salvaged 1950’s cracked ice Formica. We used scrap Marmoleum from the countertops to make the bathroom floor, and some panels of cork flooring from the ReStore for the kick-plates in there. The rounded piece of the counter folds up and down too, which has come in handy!

Oh, and I just updated the PHOTOS page too, with these pictures. I updated a few other pages too – check out the new “SUSTAINABILITY” page under the “ABOUT THE PROJECT” header.

Well, it’s not finished, but it’s quite homey, and I love it. I had to share. Thanks for reading!!

Tagged , , , , , , , , , ,

Tumbleweed Tiny House Workshop in Boston, February 9 + 10

It’s that time of year again! The Tumbleweed Tiny House Workshop will be happening in Boston in a few short weeks and I’m excited to say that I’ll be guest speaking at this SOLD OUT (!) workshop, talking about my experiences building a Tumbleweed house this fall and sharing my expertise in small-scale (tiny) off-grid systems for your tiny house. The workshop is Feb. 9-10, and you can still put your name on the wait list! Deek Diedricksen is hosting this one, and he’s a wonderful teacher and makes the workshop really fun.

So if you’re already signed up, I’ll see you there! Bring your tiny house questions and get ready to be inspired.

Here's a photo from last year's Tumbleweed workshop, when we visited the first ever built Tumbleweed house that Jay lived in for years.

Here’s a photo from last year’s Tumbleweed workshop, when we visited the first ever built Tumbleweed house that Jay lived in for years.

Tagged , , , , , , ,

Tiny House Madness!

I’m in Vermont at Yestermorrow for the next two weeks building a tiny house on a trailer. It is a modified “weebee” house from the Tumbleweed company. We are building it on a custom aluminum trailer, which is new to me (I think most people build tiny houses on steel frame trailers, but I’m excited to see how this turns out. It does pose some new challenges however, and we are experimenting with some metal reactions). I will post lots of pictures 🙂
Also! Tiny House workshop coming up with Derek Diedricksen in November (2-4) in Boston. I will be bringing the COMET, it will be almost finished! Tons of awesome speakers/guests. Here’s the poster:


Can’t wait for that!

I’m really going to do my best in the next two weeks to keep you updated on this tiny house build. It’s a crazy intense workshop – building/construction from 9 am – 5 pm, then class and studio time designing our own tiny houses from 5- whenever you fall asleep at your desk! But I will do my best to update, because it’s an awesome process we’re going through with this tiny house. Working as a group is always an interesting experience!

until then!

Tagged , , , , , ,

Updates, Updates! Plus: Vintage Trailer Eye Candy

Hello!

I need to apologize for my lack of uploaded photos of the COMET progress from the past month. It’s so frustrating, because I really want to share them with you all, but I am having technical difficulties with the camera, alas! HOPEFULLY I can resolve the issue soon and we can get back on track!

Until then, I have some other news:

1. Just got back from a 2 day “Greenhouse Design” workshop at Yestermorrow Design/Build School, where I finalized the design of my “bumper” garden – a mini, lightweight greenhouse mounted to the back of the trailer, supported by the bumper. It was great to learn about the different material options for building a greenhouse. In order to be as lightweight as possible, I’m going to go with aluminum framing and polycarbonate  sheets – a structural panel. Can’t wait to get started on the fabrication/building of that!

Greenhouse made from recycled windows, as seen on Apartment Therapy. Such a good idea! I also thought of upcycling an old carport into a small greenhouse.


2. Lloyd Kahn, my favorite tiny house/alternative dwelling author, is coming out with a new book and guess what it’s all about? Campers and houseboats! yay! He recently released his Tiny House book, which had a full page spread about mobile dwellings, but I can’t wait to get a hold of this book dedicated to unique camper houses and house boats. I think it is going to be titled “Wheels and Water”. If you live in an awesome trailer or houseboat, he is looking for submissions too for the book. Head over to http://lloydkahn-ongoing.blogspot.com/ for more on that!

3. I’ve been on a fermentation rampage the last few weeks. Saurkraut, Curtido (Salvadorean suarkraut for papusas), and Kombucha have been filling the fridge and the dark corners of the basement. I’ve been experimenting with double fermentation of the Kombucha and have been perfecting the Curtido recipe (which is extra magical as it uses whey as part of the fermentation process). I have more Kombucha mothers than I know what to do with at this point, but it’s nice to have enough to try all different flavors with. My first batch turned into straight up vinegar, but I have been planning on using that for salad dressings and other vinegar drinks that I have recipes for from the book “Making It” by Kelley Coyne + Erik Knutzen. I will share my super affordable, DIY $5 fermentation set up and some recipes soon!

4. I’m addicted to looking at Pinterest pages that are all about vintage camper eye candy. I have 4 new ones to share with you. It’s such a high concentration of vintage camper pictures in one place, it is almost overstimulating. Each one is full of good ideas for design + storage too.

Here we are:

Trailer Parks + Trailers I LOVE!

My Vintage Trailer Restoration

Creative Camper Interiors

Fun Little Campers

Some of them have some of the same photos, but for the most part each one is worth checking out if you love vintage trailer eye candy!

I am always trying to figure out what I want to be when I grow up (I feel like the answer will always be “Everything”). While at Yestermorrow, I get so excited about each subject I learn about it’s like a new career path unfolds in front of me every other week! I’ll be a solar house designer, I’ll be a Greenhouse builder, I’ll be a tiny house builder or a teacher. I made use of the drafting tables at Yestermorrow while I was there and after class did some “architectural” drawings of camper designs of the future (We can all agree that most modern RV designs are terrible and tacky, right?). Maybe I’ll be an RV designer and try to usher in a new era of campers that look like old campers! While I work towards the silliest degree in the world (I think I’ve explained my major before – vintage trailer restoration and the culture of mobile dwellings?), I try to see how I can apply it to the future of our culture and the planet. Not sure where I’m going with this, but that’s okay once in a while right? One step at a time! Sorry this was a bit of a rambling paragraph.


Anyway, I really hope to have the camera situation fixed very soon and then I can share more COMET progress and trailer restoration how-to’s. Until then, have a lovely day! and THANK YOU for reading!


Tagged , , , , , , , , , , , , , ,

Before + After: Replacing Rotten Framing in a Vintage Camper

Like I said, lot’s of catching up to do!

I’ve got to go back to 5 weeks ago and bring you all up to speed on the progress of the COMET. She was a MESS before we went to Tiny House Summer Camp, but if you saw the article on Deek’s website, you saw some pictures of what she looks more like now – less of a mess.
Anyway, here’s the first installment of catching up the website to where the COMET stands now.

BEFORE:

Some serious demolition. After stepping around the back and almost falling through the trailer floor onto the pavement 3 feet below, we decided to replace EVERYTHING. This demolition was made 10 times easier by the use of the SoniCrafter, using the plunge-cut blade to remove rotten wood to where it was solid again.

We cleaned out all of the wood-dust (used to be framing) and insulation from the floor. Under the floor, above the chassis, is a layer of sheet metal for protection. Everything had been destroyed by the termites/carpenter ants and water damage.

Daylight is never a good thing!

The photos above show where we removed the original rotted out 1 x 1 (yes, 1 x 1) framing from that rear of the trailer to halfway under the door frame. We had to remove up to the next joist after the wood became solid, so that we could have something to screw the new subfloor into. We removed the floor framing, then, using the SoniCrafter, we cut the wall studs at a line 5.5 inches above the metal trailer frame. We decided to replace the old 1 x 1 framing with a big 2 x 6, hence the 5.5″ height.

Spongey floor spots, be gone!

AFTER:

The solution was to replace the rotten frame piece with a 2 x 6, so that we were rebuilding the trailer better than it was originally built.


This 2 x 6 is the length of the beam we just removed and is marked to be notched out for the framing around the door frame, which we wanted to save.

We knocked it into place with a few hammer swings and it fit like a charm.

We ended up shimming a bit of this, but it fit nicely for the most part, and we didn’t have to rebuild the door frame!

Bolting the new frame piece to the chassis. The 2 x 6 is notched so the drill bit would reach the top, because it wasn’t 5.5″ long.

Somehow Matt was less excited about the new framing than I was. Thanks for the relentless help and support, could not have done this without him!


View from interior, all bolted in down the line.

Sistering on some new floor studs/joists.

Reframing around the wheel-well for the new subfloor.

I was a happy camper by the end of this little part of it. Next, we re-framed the entire back, raised the rear bed up 6  extra inches, re-insulated with the denim insulation, and more! More pictures of that part soon.

Oh, and all the lumber I used is FSC certified 🙂

As always, thanks for reading!

If you like the blog and would like to help me continue working on the COMET, please consider making a small donation over at the DONATE page of this site 🙂 Thanks!!


Tagged , , , , , , , ,

Check out this Pinterest page – all about tiny houses and camper restoration

Someone shares my obsessions!

I found this Pinterest page (board?) a while back and have been refreshing the tab regularly ever since. It has all sorts of great links to DIY tutorials, camper eye candy, off-grid trailer ideas, and more. New things are added to the board all the time. Check out this link for camper and tiny house ideas!

Not Quite Vintage Tiny Homes/RVs

This is a great idea for linoleum tiles. You could do this with Marmoleum flooring pretty easily!

**Tiny House Summer Camp is SO SOON! Less than 2 weeks away, and the COMET has no floor and a wall is being replaced and reframed. I need to get the pictures off of my camera and onto the blog so you guys can see what I’m talking about! It’s crazy.

Anyway, I PROMISE pictures and details about all of the repairs later. I think you guys will enjoy the walk through. It isn’t pretty, and it’s more structural repair than I’ve ever had to do in a trailer before, but it’s encouraging because, thanks to my prior experience with last summer’s trailer, Matt’s help, and the Rockwell SonicCrafter (I need to do a tool review – this thing can’t be beat), it’s taken me 4 days to do what it took me 2 months to do last year. Amazing!


Tagged , , , , , , ,

I’m BAAAACK! And it’s crunch time for The COMET.

Hello Readers!

Thank you all for your patience these last 2 weeks while I was at Yestermorrow fulfilling my Core curriculum in a VERY intense 3 weeks of classes. I was doing 20 hour days in the studio every day while I was there (not complaining – it was the most fun, creative, an productive 2 weeks of my life!) and just couldn’t keep up with blog posts on top of studio time and the occasional few hours of sleep. I love Yestermorrow, and would recommend it to anyone looking to further their knowledge in sustainable building, permaculture, or woodworking. What an awesome learning environment! And Vermont was gorgeous. Below you can see some of my designs from the final week of class: it’s a camper and a tiny house – the camper docks into the tiny house and one wall of the camper swings open and becomes one of the walls of the house. Pretty cool! Maybe in the future I’ll build something crazy like this.

My model of the tiny house component. It’s supposed to look space-age!

However, now I’m back in Massachusetts and it’s time to put the pedal to the metal with the COMET, because Tiny House Summer Camp is in 16 (16? 16??) days (that’s it, 16 days? – and check out the nifty countdown at the bottom of the page). I have tons of catching up to do here on the website (I saw many interesting things while I was in VT these past few weeks, and can’t wait to share stories and pictures with all of you) and in The COMET. I have to have this thing that is very much mid-construction in somewhat presentable shape for the workshop in VT July 6th-9th (Tiny House Summer Camp hosted by Derek Diedricksen of Relaxshacks.com). Luckily (and I’m being facetious here) every time you are about to fix one thing in a vintage camper, you find 2 other things that are broken or damaged. For example, yesterday while I was getting ready to re-frame the rear wall in order to support a bumper garden, I found that the floor of the rear of the camper, under the bed/couch which is just storage, was totally soft. I pulled up the laminate and the floor just disintegrated underneath me, down to the frame. The joists disappeared. It was either termites of carpenter ants, but all they left was dust. So now I get to replace the floor of half of the camper and replace all of the rear floor framing around the two back corners. I’ve done this sort of repair before, and it’s always touch to get in to these spaces retro-actively and replace the structure that was put in first.

LUCKILY (and I mean it this time) for me I have the greatest friend in the world, and I’ve enlisted my friend Matt (inventor, fabricator, builder, designer extraordinaire) to help me with the COMET the next few weeks in preparation for Tiny House Summer Camp. He did tons of body work yesterday while I pulled out rotten floor, and the exterior of the COMET looks good as new. All of the holes and scratches are filled and dents are pulled. Loads of pictures to come!

Another HUGE thank you to Timbucktu RV in Worcester (1047 Southbridge St, phone # 508. 459. 1132), for the water tank and all of the other goodies for the COMET. If you’re looking for appliances for your tiny house or camper, or need any type of repair, give them a call. They’re the greatest.


OH! And don’t forget about the vintage camper/tiny house rally on July 20-22 in Brattleboro VT at the Brattleboro KOA. Go to the Brattleboro KOA website to register your vintage camper, and all unique mobile dwellings get a discount! We have about 20-30 vintage campers already, it’s going to be a great weekend. Check out my EVENTS + APPEARANCES page on this website to see more details and find out about registering.

Tagged , , , , , , , ,

On Design: Goal Articulation (What do you really want?)

Hello!

Core is going GREAT here at Yestermorrow. Vermont is beautiful. The class is AWESOME (and extremely intense). Totally crazy coincidence: my instructor is moving into the Whittled Down Caravan (check out their blog) that I saw at Derek Diedricksen’s workshop last summer. The tiny house scene is a small world (har har – pun intended.)

Anyway, here’s what I’ve been thinking on the last day or two:

I think I’m going to start getting more conceptual on this website sometimes. It’s my platform for expressing everything that goes into The COMET – which is so much more than solar panels and recycled materials and new technologies. My heart goes into it, my dreams (mostly daydreams) go into it, all of my time and energy. A lot of THOUGHT goes into it – more than can be measured. It’s completely consuming – and I love that about it. In a single, life consuming project I get to explore a world of possibilities and techniques and processes. An entire history of changing attitudes about the way we live.
(Being at Yestermorrow gets me really excited about this stuff – maybe that’s why I’m feeling this way at the moment.)

So here I can express some of the THOUGHT and process that goes into the Design of the COMET as an educational tool, a classroom, and a home. More than just design iterations of program and diagramming, there is a mental and emotional process that goes into designing your own home. Here’s what I learned about myself as a designer today:

For the last few years professors have reprimanded me for being obsessed with technique and materials (what can I say, I’m a doer and a maker). They offered no alternative, but I understood that the way I approached design was backwards and too focused on minute details from the start. Today I had a major breakthrough. Woah.

Goal Articulation:

what do you want? Can you accurately express what you REALLY want out of your home (or another design)?
You want a tiny house, a big house, a cute house, an energy efficient house, or a fancy house? You want solar panels, a grey water system, and a composting toilet?
No. What you want has nothing to do with the House. (Though these details may help us achieve our goals.)
I think what you want is closer to something along these lines:

I want more free time.
I want more money in my savings account so that I can travel.
I want flexibility.
I want simplicity.
I want to be healthy.
I want to spend more time on interpersonal relationships.
I don’t want to work all the time, I want to relax.

So, What do you really want?

Here’s what I found today:
I was trying to articulate my goals for taking this Permaculture/Ecological Design course. (Talk about it using active, present tense). I just did some free-writing + listing to get started.

– I have the tools to design a building/home in a productive landscape.
– I can design with more than the materials in mind.
– I understand how to actual goals versus superficial goals.
– I can design buildings and homes that interact with the landscape and location.
– I can articulate what makes a successful, functional home.
– I can envision the whole picture.
– I can design for leisure.
– I can design a home with free time in mind and a low-maintenance landscape.
– I can let the goals drive the design process, instead of the details.

I actually couldn’t pick just one that summed everything up, but I think you get the idea. These goal articulations are much more than just “I want to learn about permaculture principles in this class.”

And then I applied this concept to my design process:

I hope this post was helpful to those thinking about designing their own dwellings. If we can establish what it is we really want out of our homes and our lives, the details will fall into place. It can be surprisingly difficult to express what we REALLY want out of our living situations, but I hope this sheds some light on that process!

Tagged , , , , , , , ,

Yestermorrow Design/Build School: Ecological Design in The Built Environment

Hello!

As some of you readers may know, I attend Yestermorrow Design/Build School in Vermont for certain workshops and courses throughout this year as I work towards my Certificate in Sustainable Design/Building from the school (also, as I receive credit at my college). It’s not a full-time school like traditional college, but instead I take a few weeks here and there throughout the year to do very intense, immersive, hands-on courses. My coursework here helps me with The COMET – each class that I choose to take is directly related to an aspect of the project.

Today I start the most intensive course in the Certificate program (so I’ve heard), we call it “Core.” It’s technically titled Ecological Design in The Built Environment, and it is the basis of the curriculum here. It focuses on permaculture and sustainable community design, as well of the principles of design and basic design and drawing tools. It’s basically a semester long Design Fundamentals course packed into 3 very intense weeks (I think we have one day off).

Just wanted to let you guys know what I was up to for the next 3 weeks. I probably won’t be able to post as much while I’m here, but look for some updates and a few posts about stuff I’ve been meaning to talk about for a while. It’s very beautiful up here in Vermont this time of year, especially at Yestermorrow campus.

Wish me luck!

Thanks always for all of your support!

Tagged , , , , , , , ,