Monthly Archives: October 2012

Catching up, Again

So, picking up where I left off in the post “Replacing Rotten Wood in a Vintage Camper.” I’m going to try and squeeze a few days worth of progress into this post. And again, I’m going back to June/July (wow, it’s crazy that it’s been that long! I have so much catching up to do here on the blog and so much to share! If only there were two of me – one to wield the drill all day and one to blog about it at the same time!). This stuff was all happening in June, in preparation for Tiny House Summer Camp, in the beginning on July. Okay, let’s get to it!
So where we left off I had replaced the rotten framing on the starboard (door) side of the trailer. Now we’re moving over the the rear port side of the trailer, to replace what was rotten there. The damage hadn’t reached as far as on the starboard side, which was a relief.

Here, I’m just removing all of the rotten framing to make room for some replacement framing.

I used a pry bar, a five in one, and the Rockwell SoniCrafter (again, can’t recommend this enough to vintage trailer restorers – it’s a life saver) to dig out the old, soft framing to the place where it was solid again. And as on the other side, we cut the studs to 5 1/2 inches above the trailer frame, so that we could replace it with the 2 x 6 on end.

Same as the starboard side replacement joist – we bolted it to the frame (notched the 2 x 6 for the length of the longest bit we had) and used metal strapping for extra structural stability. No way my house is falling apart now! At least it’s better than the original stapled construction 🙂

Here you can get a feel for the bigger picture. Also, in this photo I want to point out something that I knew I wanted to change in the rebuild: on the left side of the photo, spanning across the rear wall of the camper, the 2 x 2 that is right in the middle of the rear hatch opening really bothered me. It’s right in the middle of the only large storage space, making it so that you can’t fit large things through that door. I decided I needed to re-design the bed/couch framing so that it didn’t interfere with the rear hatch opening.

Well, it’s time for me to get back outside and keep working on the COMET. I’ll be back later with more catching up on the last few months of progress and bringing the blog up to speed.


Tagged , , , , , ,

Tiny House Design Build Recap, and Looking Ahead

I can’t believe it’s fall, for real it’s fall!

In Vermont, the leaves went from barely changed last week when I was there building a tiny house, to almost all fallen this past weekend when I was at Yestermorrow taking my final Sustainable Design/Build Certificate course, Super Insulation for Zero Energy Buildings. Got me thinking about building a super insulated tiny house. Tiny houses already use so little energy to heat (or cool, depending on where you are), but super insulation would be a great option for a tiny house that was on a foundation. Why spend money on heating fuel if you didn’t have to by designing your home this way? Very interesting stuff.


So here are a few more photos of the tiny house build at Yestermorrow from last week. I’m not going to go into great detail about how we built the house, because I still have so much to catch up on writing about the COMET’s progress and other things, but please ask questions if you have some burning things you want to know! Now I can officially say I’ve built a tiny house on wheels.


You can see the 4 x 4 supports that hold the house together and form the framing of the loft floor. TerraNova, the lovely lady from Boston that I met at the workshop, and hopefully a longtime tiny house buddy, is problem solving.

Here you can really see the loft framing and spacing of the 4 x 4s.

The rafters are up, and the gable ends are on. While people were working on the roof, I was on my back underneath the trailer, under both axles (yes, I was terrified) screwing the house into the trailer. But I’m used to rolling around under the chassis of a trailer, so I volunteered!

That’s me, in the pink scarf, scared to death nailing in the roof while Terra holds me up on the scaffolding. Thanks Terra!

We put on as much siding as we could by the end of the last day. We had installed all windows, all trim, decking on the porch, and a few other details. I think much of the exterior trim/siding was salvaged from Detroit.

What an awesome team! We did it! By the end of the day, we were all ready to eat some pizza baked in the earth-oven next to the Quonset hut.

Thanks Timothy for all of these pictures!


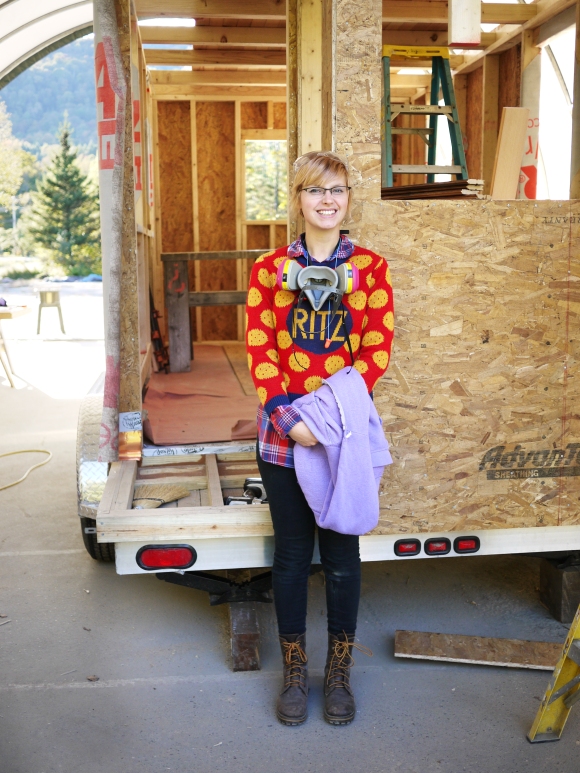
Me with the tiny house, in my famous Ritz crackers sweater. Everyone called me “Ritz” for two weeks. Photo courtesy of Swan Moon.


And there you have it! 10 people built a tiny house in 10 days. After the class, the instructors finished up the siding and now the house is set to go back to Detroit to it’s new owner.


I’m doing a segment for spaces.tv this weekend, which I am super excited about and SUPER busy getting ready for. The COMET will look pretty rad by then, and then I think I’ll do some sort of unveiling (it’s not done, and won’t be till November 2 – Tiny House Workshop with Deek in Boston – but it’s looking pretty good!).

Thanks to everyone to continued support and thank you for reading along!


Tagged , , , ,